Written for Pro Book Edits by V.K. Dixon. All content and images used with permission.
We are so honored to share this brilliant article from talented fantasy and romance author, V.K. Dixon, with you today! V.K. has created a brilliant hack for writers who are in the revision stage of publishing a novel. She kindly agreed to share the details of her creative and money-saving method with all of us. A bonus of her revision method is the exciting pre-book-launch marketing potential it provides!
Be sure to bookmark this post so you can come back to it for the next time you are revising a novel.
And stay in touch with both Pro Book Edits and V.K. Dixon on Instagram so that you never miss an editing tip or writing update!
Find Pro Book Edits on Instagram: HERE
Find V.K. Dixon on Instagram: HERE
How to Print a Fully Bound Manuscript for Revisions
Author: V.K. Dixon
Have you finished your first draft and are ready to start revisions?
This is one of the most exciting stages of the writing process. Oftentimes you’ve spent weeks, months, or maybe even years drafting this story. If you’re like most writers, you can’t wait to jump back in and clean it all up. Maybe you’ve done tons of research on the best way to begin the revision process. You probably have highlighters, pens, and sticky notes all ready to go. Now, it’s time to print your draft so that you can get a tangible sense of your story.
I won’t be going into the “how” of revisions today, but I wanted to share with you a tip for the process.
Almost every author likes to print out their first draft when it’s time to revise. (I’ve heard of some who don’t, but personally, I recommend it as it helps to give you a fresh perspective on the story. Plus, it’s fun.)
For years, any time I printed my draft, I did it at home—which used up nearly all the toner in my printer. More recently, I decided to go to Office Depot or Staples to get it printed. That wound up costing about the same as a cartridge of toner. With both of those options, I had to hole-punch the pages and place them into a binder myself. Then, I had to read my story on 8.5×11 pages, holding a cumbersome binder. It wasn’t the most pleasant experience, but it was all I knew to do.
Storing my old drafts was even more annoying. Those binders were taking up a lot of space, and they weren’t exactly pretty to look at on my shelves.
So, I decided to try something new.
Earlier this year, I decided to print out the first draft of my novel to begin the revision process. This particular novel is long (~190k words at the moment), and when I uploaded the file to both Office Depot and Staples to compare prices, the printing cost was somewhere around $140. That seemed outrageous to me. I didn’t want to print out hundreds of pages on my home printer either, knowing that I’d tear through the toner and wind up spending around $50 for a replacement.
That’s when I remembered: Ordering a proof copy of my debut novel Lake of Glass only cost me around $10 from Kindle Digital Publishing and Barnes & Noble Press.
It was a real lightbulb moment for me.
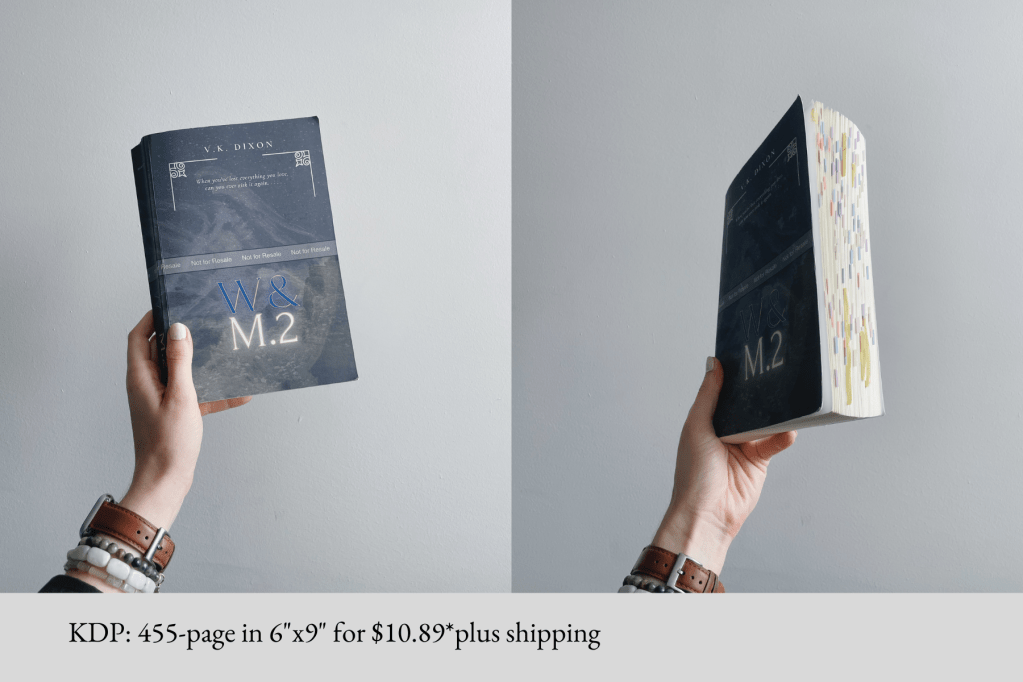
For the sake of research, I quickly formatted my ~190k word manuscript in Microsoft Word before uploading it to KDP just to see the cost difference. I was astounded to discover that in order to print my 455-page 6×9 manuscript as a fully bound paperback would only cost me $10.89*. (Disclaimer: Printing costs from KDP have gone up since this original order, but not by much.)
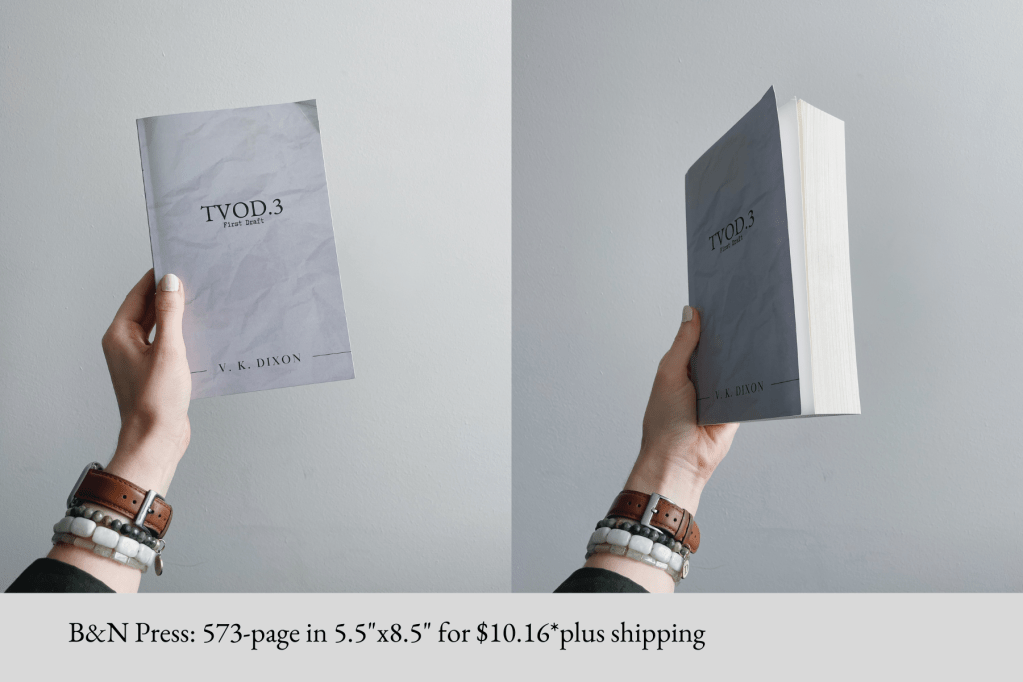
The difference in price was astronomical, so later in the year, I printed another draft from B&N Press to also test their prices. For my 573-page 5.5×8.5 manuscript, it cost $10.16*.
(*Both of these prices were before shipping.)
All in all, it costs less than $15 for a bound copy of my first drafts from both KDP and B&N. Which is way more budget-friendly than at-home printing or an office supply store. Beyond that, it’s far more comfortable to hold, easier to make notes in (this is a personal opinion, of course), and easier to store after you’re done with it.
If you’re thinking of giving this a try, but don’t know which company to use, here’s my suggestion:
Overall, KDP and B&N Press are both great options; they both provide free ISBNs and their prices are comparable. Personally, I’d recommend using B&N Press due to the higher quality of their print and the fact that they don’t put the “not for resale” banner across the front. The only con to B&N over KDP that I’ve found is the shipping cost and time (I found that I got my book faster from KDP). However, with KDP, you need to be sure that you don’t accidentally publish your book or it will be out in the world for others to buy. With B&N, they have the option to print for “personal use” only, which means you’ll never have to worry about it being put on the market.
Now, if you want to print your draft this way, but you don’t know how to format it, don’t worry. Here’s a very short, simple formatting guide:
(This tutorial is for Microsoft Word. If you don’t have Word, you can technically do this in Google Docs, but the program isn’t made for that which makes the correct formatting far more difficult to achieve in my personal experience.)
(Additional note: Both companies require a cover for printing, and will provide the exact sizing specifications/cover templates for your book on their sites. You can easily design as simple or elaborate a cover as you like on Canva for free.)
- First, select or enter your manuscript in a new Microsoft Word document. Whether you write in another software (I use Scrivener) or not, you should have a separate document for your formatted file. You can either duplicate your original or simply copy and paste from the other software program.
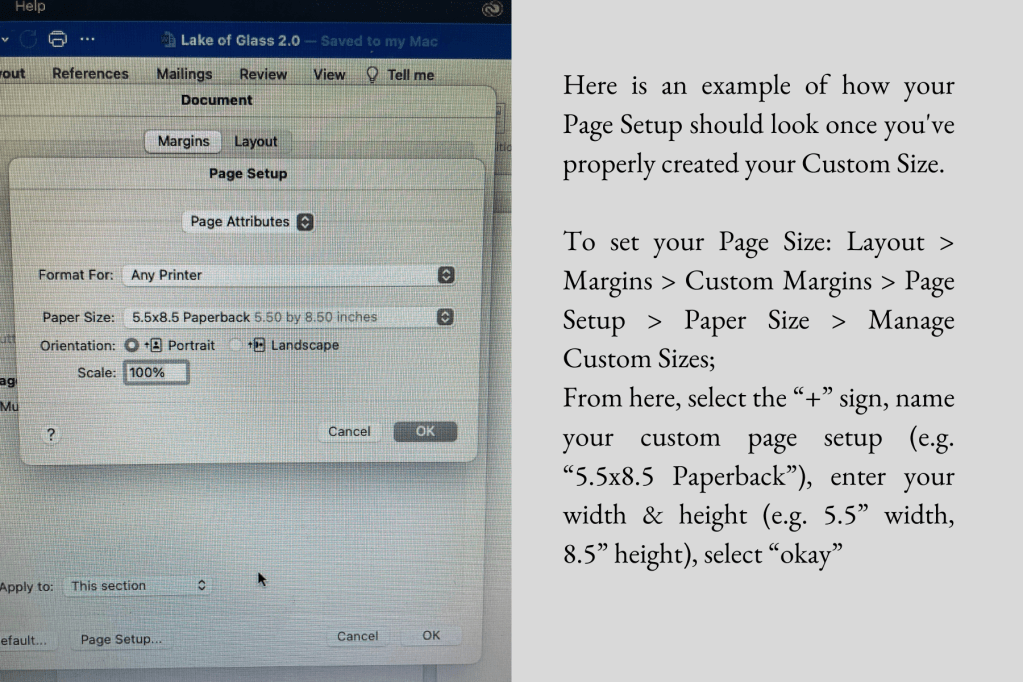
- Second, select and set your page size. I prefer 5.5”x8.5”. This is a nice feel for a paperback, but you can do whatever size you prefer.
- In Microsoft Word: Layout > Margins > Custom Margins > Page Setup > Paper Size > Manage Custom Sizes; From here, select the “+” sign, name your custom page setup (e.g. “5.5×8.5 Paperback”), enter your width & height (e.g. 5.5” width, 8.5” height), select “okay”

- Next, adjust your margins. You can check KDP and B&N Press’s guidelines for this, but I find a book of ~300-500 pages works best with the margins of Top 0.5”, Bottom 0.5” (or 0.75” if you’re adding page numbers), Inside/Gutter 0.75”, and Outside 0.5”.
- In Microsoft Word: Layout > Margins > Custom Margins; From here, select “Mirror margins” from the “Multiple Pages” drop-down, and enter your preferred margin sizes.
- Optional but recommended: Go through your manuscript and insert page breaks at the start of each chapter. This will make your reading/revising experience much better.
- In Microsoft Word: Find the end of each chapter, make sure your cursor is set after the final line, and insert a page break (Layout > Breaks > Page)(keyboard shortcut: command+enter (Mac), or control+enter (PC)).
- Truly optional: Insert page numbers, headers, and any other design elements you’d like. I won’t go into the details of this one because it’s a far more involved process. But if you want to learn how to do this, a simple YouTube search will give you the ins and outs of how to include any special elements in your manuscript.
- Finally, download your manuscript as a PDF. This is the best way to upload your draft to both KDP and B&N Press.
- In Microsoft Word: Print > PDF (drop-down box at bottom left corner)>Save as PDF; From here, make sure your save location and document title are as you’d like them to be, then select “Save”.
And that’s it. Once you’ve followed those steps, you can upload your PDF to either printing platform, and within a week (or two), you’ll have your fully bound manuscript in your hands!
Thank you so much for reading! I hope you found this helpful.
Happy revisions!

Leave a comment